Label Images
A label identifier (like E-1) is automatically created for each energy source (Lockout/Tagout) or step number (Reliability) in your procedure, except for nonspecific energy source types. You can insert the same label identifier multiple times on the image.
Note: For Energy Source labels, the text and bounding box are color-coded to match the energy sources.This does not apply to nonspecific energy source types (those that are simply called LOCK-OUT POINT). If you enter text without picking an energy source, the labels are black.
By default, all labels have an arrow. Changes to any of the labels are automatically updated on the image.
To add or modify a label:
- Open the image for editing if you have not already done so. See Images Tab.
- Click Label the Image. (This is not available if editing an image in the equipment hierarchy.)
-
To add a label:
-
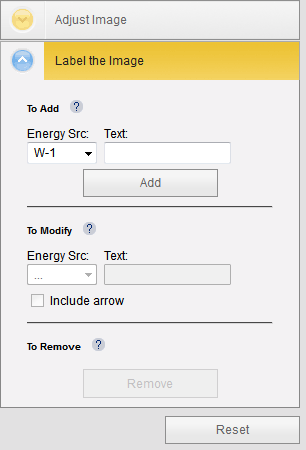
In the To Add section, choose either an energy source from the Energy Src list or a step number from the Step # list, depending on whether this is a Lockout/Tagout or Reliability procedure.
-
In the Text field type text for the label if desired. The energy source ID (such as E-1) or step number is included along with your custom text.
- Click Add. The label is placed on the image with an arrow.
- Click and drag the label to the desired location. Click and drag the arrow to the desired location.
-
-
To modify a label, click the label that you want to modify and then use the controls in the To Modify section as follows:
- Use the Energy Src or Step # list to choose a different energy source or step number for the label.
-
Use the Text field to change the text on the label. To use only the energy source ID or step number, delete the custom text in this field.
- Clear the Include arrow check box to remove the arrow from the label. Select the check box to include an arrow.
- To change the color of an arrow, click the colored box next to the Include arrow check box and select a different color.
- To remove a label, select the label, then click Remove. Both the label and arrow are deleted.
- To undo your changes, click Reset. The image is returned to its previous saved state.
- When done editing, click OK to save the changes and update the image.
The example shown is for an image in a Lockout/Tagout procedure.