Set Up Regions
Use this page to add, modify, or delete regions. A region groups sites geographically. This streamlines certain procedures because you can act on an entire region instead of individual sites. For example, instead of running the same report for each site you can run the report once for the region and the report will include all sites in that region. Assigning user access is also simplified with the ability to assign rights by region.
To access this page select Setup & Admin > Setup Regions. This is available only if you are logged in as the subscription administrator.
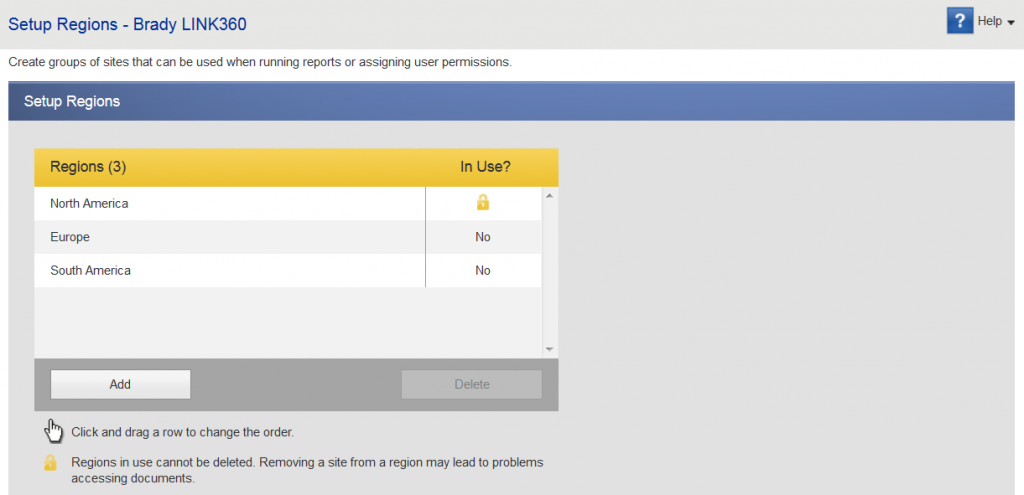
The left side of the screen shows a list of regions. A lock in the In Use column indicates that at least one user has view or edit rights to that region. See Edit User Details for more information.
To add a new region:
- Click Add. A panel opens to the right titled Add New Region.
- In the Name field type a name for the region.
- In the Sites list, select each site within the region. You can assign sites to more than one region.
- Click Save.
To delete a region:
- Look at the In Use column for the region you want to delete. If it contains a lock, you cannot delete the region because at least one user has view or edit rights for that region. (See Edit User Details.)
- Select the region.
- Click Delete.
To edit a region:
- Select the region. A panel opens to the right titled Edit Region.
- Use the Name field to change the name of the region if desired.
- In the Sites list, clear the check box for any site that you no longer want included in the region and select the check boxes for any sites that you want included in the region.
- Click Save.
Note: Removing a site from a region could cause a draft document to no longer have a user associated with it. If this happens, a message asks you if you want to transfer ownership and takes you to the Transfer File Ownership page. See Transfer File Ownership.