Print Labels to GlobalMark or Other Printer
To access the Lockout Tags & Energy Source Labels page, view the associated lockout procedure (see View Documents) and in the column to the right of the preview, click Print Tags and Labels.
Note: The margins on some older label materials may not line up correctly and print outside the cut lines. If this happens, enter -0.33 in the Top Extra Page Margins field and reprint. Continue adding or subtracting in increments of +/-0.01 until the labels print inside the cut margins.
To print labels:
- Choose the printer.
Brady BBP 33, BBP 35, BBP 37, Brady i3300, or BradyJet J2000: These printers require the Brady Print Service software. Instead of following the steps below, see Print Energy Source Labels.
- Other Printer: You will be able to specify the exact printer later in the process.
- GlobalMark: Edit printer settings in Microsoft® Windows® to ensure correct printing. See GlobalMark Color & Cut Print Setup for instructions.
- Select the Label Size. If you are printing on a GlobalMark Color & Cut printer, the following label sizes are available:
- Standard 4 x 1.5: Use any solid white continuous label tape that is at least four inches wide.
- VIP 4 x 2.5: Use any solid white continuous label tape that is at least four inches wide. Finished labels can be affixed to VIP tags that are 4" x 2.5"
- VIP 3 x 1.5: Use any solid white continuous label tape that is at least three inches wide. Finished labels can be affixed to VIP tags that are 3" x 1.5".
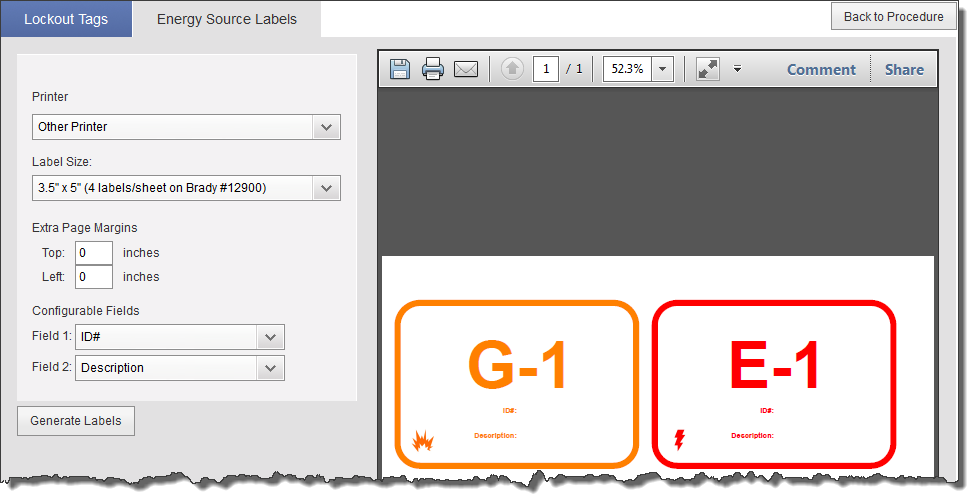
- (For Other Printer only.) Under Extra Page Margins, adjust the space above or to the left of the labels if desired. A positive number increases the margin and a negative number decreases the margin. You can see the result when you click Generate Labels.
- Select identification items from the Field 1 and Field 2 drop-down lists.
- Click Generate Labels. The generated labels display in the preview section.
- If necessary, adjust the label size or margins, then click Generate Labels again.
- Click the Print button in the preview area (if available with your PDF viewer plug-in), or right-click in the preview section, then select Print from the options. The Print window opens. If you selected Other Printer in step 1, use this window to choose the specific printer.
- The Print window contains a small preview of the labels. Verify that your tags will not be cut off when printed. If necessary, adjust using the page sizing and handling options in the Print window. IMPORTANT: If printing to a GlobalMark Color & Cut printer make sure you have set up your computer as described in GlobalMark® Color & Cut Print Setup.
- Click Print in the Print window.