Print Energy Source Labels
Note: The margins on some older label materials may not line up correctly and print outside the cut lines. If this happens, enter -0.33 in the Top Extra Page Margins field and reprint. Continue adding or subtracting in increments of +/-0.01 until the labels print inside the cut margins.
To print energy source labels:
- Open the lockout procedure (see View Documents) and in the column to the right of the procedure, click Print Tags and Labels. The Print Tags and Labels button is only available for published documents (see Publish).
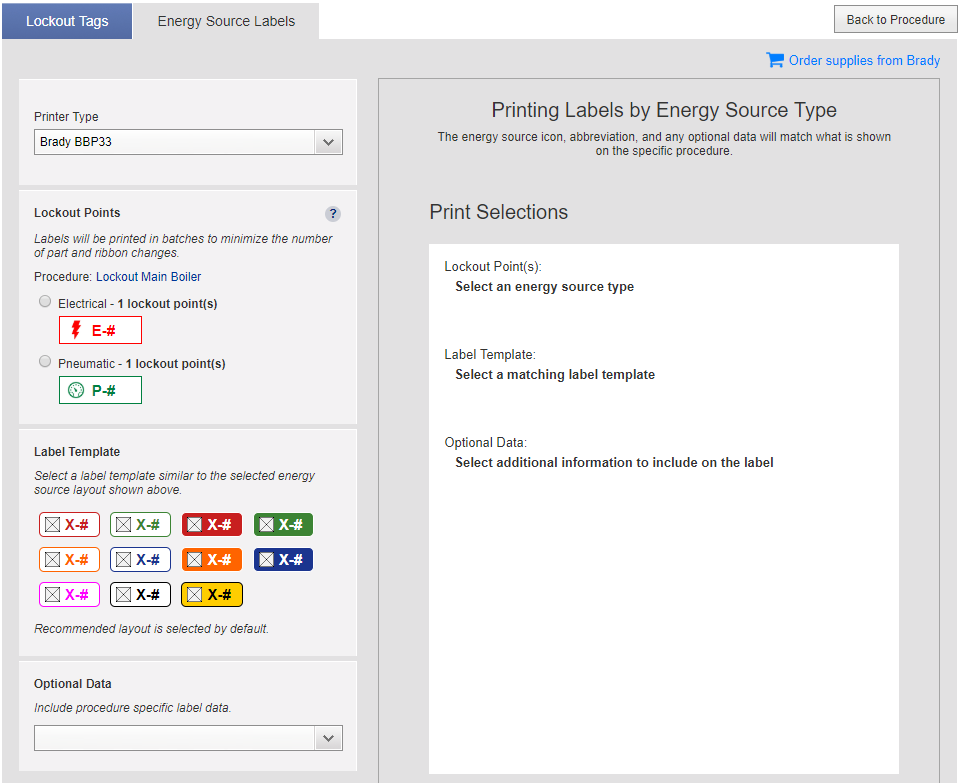
- Click the Energy Source Labels tab.
- In the the Printer Type list, choose the printer model
Brady BBP33, Brady BBP35, Brady BBP37, Brady i3300, or BradyJet J2000: Follow the steps in this topic.
- Other Printer: Instead of following the steps below, see Print Labels to GlobalMark or Other Printer.
- GlobalMark: Instead of following the steps below, see Print Labels to GlobalMark or Other Printer.
-
Under Lockout Points, select the energy sources to print labels for. For single-color printers, choose one energy source at a time. For full-color printers, you can print multiple energy sources at once.
- Brady BBP33, Brady BBP35, Brady BBP37, Brady i3300: Because the printer ribbons have just one color, you will need to print all the labels of one type, change the ribbon to the color for the next type, and then print all the labels of that type. Click the type of energy source to print labels for and make sure the correct color ribbon is in the printer.
- BradyJet J2000: Click the check boxes to select all the energy source types for which you want to print labels.
-
(Brady BBP33, Brady BBP35, Brady BBP37, Brady i3300 only.) The software automatically picks the label template that most closely matches your styling for the energy source type. (Energy source type icons, colors, and so on are defined with text defaults. See Lockout/Tagout - Edit Text Defaults.)
If you wish to use as different label template, click an image under Label Template.
-
Under Optional Data, choose one additional item to print on the energy source label. You can leave this blank. Data is obtained from the procedure.
- ID#: The procedure ID.
- Facility: Usually the site and area containing the equipment.
- Location: The location of the equipment within the facility.
- Description: Usually equipment information or the name of the equipment.
- Energy Source Description: The description provided for this energy source in the procedure.
-
Click Preview & Print Labels.
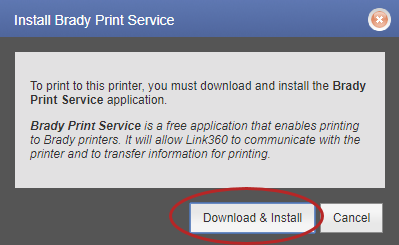
The first time you print to one of these printers from LINK360 software, you must install a small printing program, Brady Print Service.
-
The LINK360 software displays a window about installing the Brady Print Service. Click Download & Install.

Note: If your IT department blocks the download, contact Brady Support at the numbers provided on the screen.
- Run the downloaded file to install the software.
- Close the window that indicates that the installation is complete.
- Return to the LINK360 browser tab, Lockout Tags & Energy Source Labels. You can close the browser tab for installing the Brady Print Service.
- Click Preview & Print Tags.
-
-
Open the Brady Print Service when prompted. (This prompt does not appear if the check box to always open these links had been selected in the past. Go to the next step when the Brady Print Service window opens.)
If Microsoft Windows displays a message about the firewall blocking access, be sure to allow access. Without access, the Brady Print Service may not be able to automatically find printers on the network.
-
Make sure the settings in the Brady Print Service window are correct.
BradyPrinter J2000: Be sure to hover the mouse pointer over any warning icons
 . If the cutter offset is not adjusted correctly, the labels could be cut in the wrong place. See Open Brady Status J2000 below for instructions.
-
Printer: Select the printer.
- Local: The printer should already be selected because the software detects it. If the printer isn't shown, make sure it is turned on and connected to the computer running LINK360 software.
-
Network: Select the network printer from the list. The software automatically detects Brady printers on the network. You can also manually add a printer.
 Click to learn how to add a network printer manually.
- Click the Manage Network Printers button.

- Click ADD PRINTER and fill in the Add a Printer window.
- In the Name field, type a recognizable name for the printer. This name will be displayed in the Brady Print Service window in the future when you select a printer.
- In the Printer Model list, select the type of printer.
- In the IP or DNS Address field, type the IP or DNS address to identify the printer's location on the network. You can often find this information on the printer in the network settings. Otherwise, you may need to ask your system administrator for this information.
- Click Test Connection to verify that software can connect to the printer.
- Click OK.
- Click the back arrow to return to the Brady Print Service window.

The printer is now included in the list of printers for this user on this computer.
If you don't see the network printer in the list, make sure that it is turned on and connected to the network.
- Click the Manage Network Printers button.
-
Label Part: The software automatically detects the label supply and ribbon in the printer and alerts you if the label supply or ribbon in the printer does not match what is needed. To rectify any errors:
- Point to the error icon
 for information about the error.
 - Install the correct label supply or ribbon.
- Click the refresh button
 to update the information.
- Point to the error icon
- Print Copies: Set the number of copies of each label that you want to print.
- Advanced Settings: (BradyPrinter J2000 only.) Click to open a printer properties window.
- Open Brady Status J2000: (BradyPrinter J2000 only.) Opens the Status Monitor software that came with the printer. Use the alignment tab to adjust the cutter offset if needed. (An offset of 0 is generally best for energy source labels.) Be sure to click Set before leaving the alignment tab
-
- Click Print.
- (Brady BBP33, Brady BBP35, Brady BBP37, Brady i3300 only.) Repeat the above process for each energy source type.